IH #2 Cart
I have always liked the looks of IH's carts made for their garden tractors, especially the #2. As far a usefulness, the #2 is a little lacking since it cannot dump as steeply due to being lower to the ground. This is a problem when trying to dump a load of weeds or something similar. However, it would be nice to haul heavy things like concrete blocks or something like that since you don't have lift them out as high compared to standard carts.
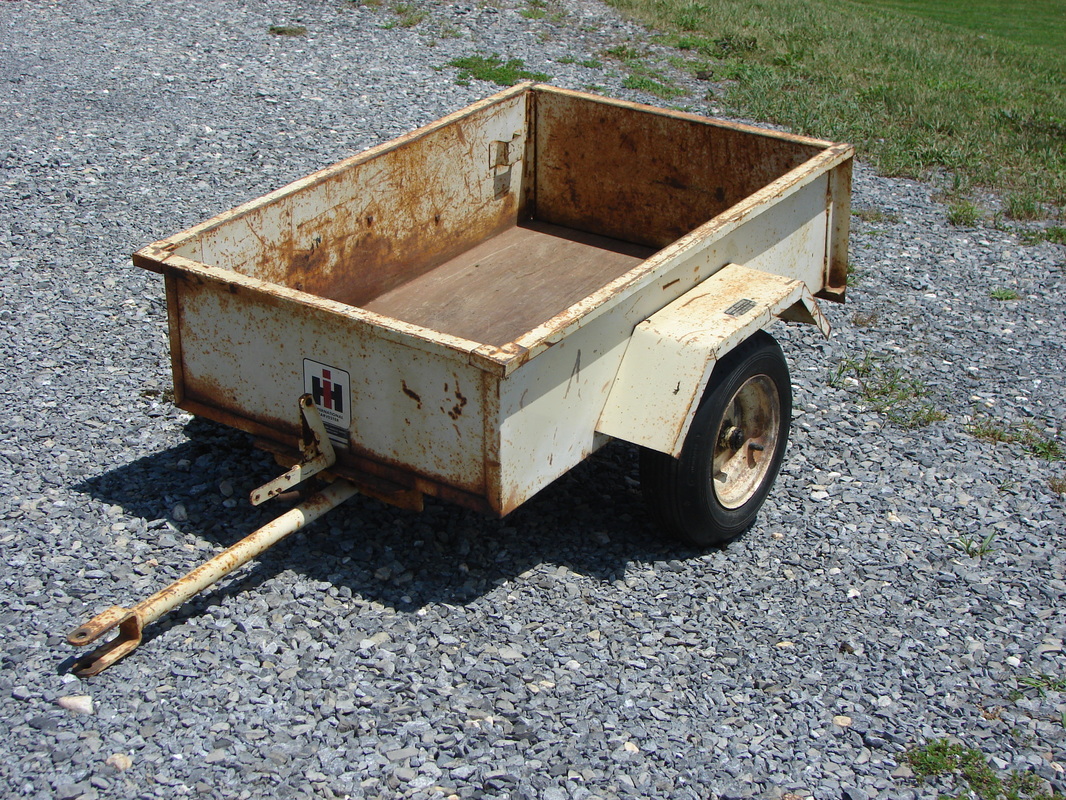
The #2 cart I have came from an auction that was in the middle of nowhere. It was in really nice shape with just areas of light surface rust. The original tires were even in great shape with hardly any cracks. The original serial number tag was also still on it.
After the restoration of my Original, I decided to go with something a bit easier. I also needed something to pull behind it, so this would fit nicely.
First I took pictures of everything, since I like seeing before and after of everything:
|

|
I also took pictures of the thing disassembled, but I will just show ones of when I started painting.
After dis-assembly, I wanted to get the correct white to use for the top coat. Judging by the white used on the Original and the some of the Quietlines, this white had to be the 902 white. Some ads I have of the cart also showed a very bright white, which the other 2 really are not. Now I had the correct top coat color.
I decided early on the I wanted this to look original as possible. That required me to keep the original Goodyear tires on it, especially since they were in very nice shape. The only problem was in order to blast and paint the wheels I would have to take the tires off. Since these were 40 year old tubeless tires, taking them off would run the risk of not being able to get them back on. I ended up taping the tires off with duct tape for sand blasting, then masking tape for painting.

Shown above is after blasting with duct tape removed and wheel ready to be painted.
The rest of the project was straight forward. I had minimal body work to do since everything was very straight and dent free. I did take the time to try and bang out some of the larger dents in the bottom of the body.
Back to the wheels, my method paid off and I got the results I wanted:
The rest of the project was straight forward. I had minimal body work to do since everything was very straight and dent free. I did take the time to try and bang out some of the larger dents in the bottom of the body.
Back to the wheels, my method paid off and I got the results I wanted:

After painting, it took no time to put everything back together. The finished product is shown at the top of the page.
Not in the picture are the NOS dust cover caps that go over the ends of the axles. I got black ones and they really make the project complete. I also had a new serial number plate made, which I have yet to install. When I install it I will post it here.
Below is a shot of the new serial number plate I had made to replace the old one:

I also had a chance to take a side shot of the cart so you can see the black wheel caps that are often missing:

